Takeaway Kiosk Module Manual
October 23, 2025 - Reading time: 151 minutes
Takeaway Kiosk Module Manual
1. Module Overview
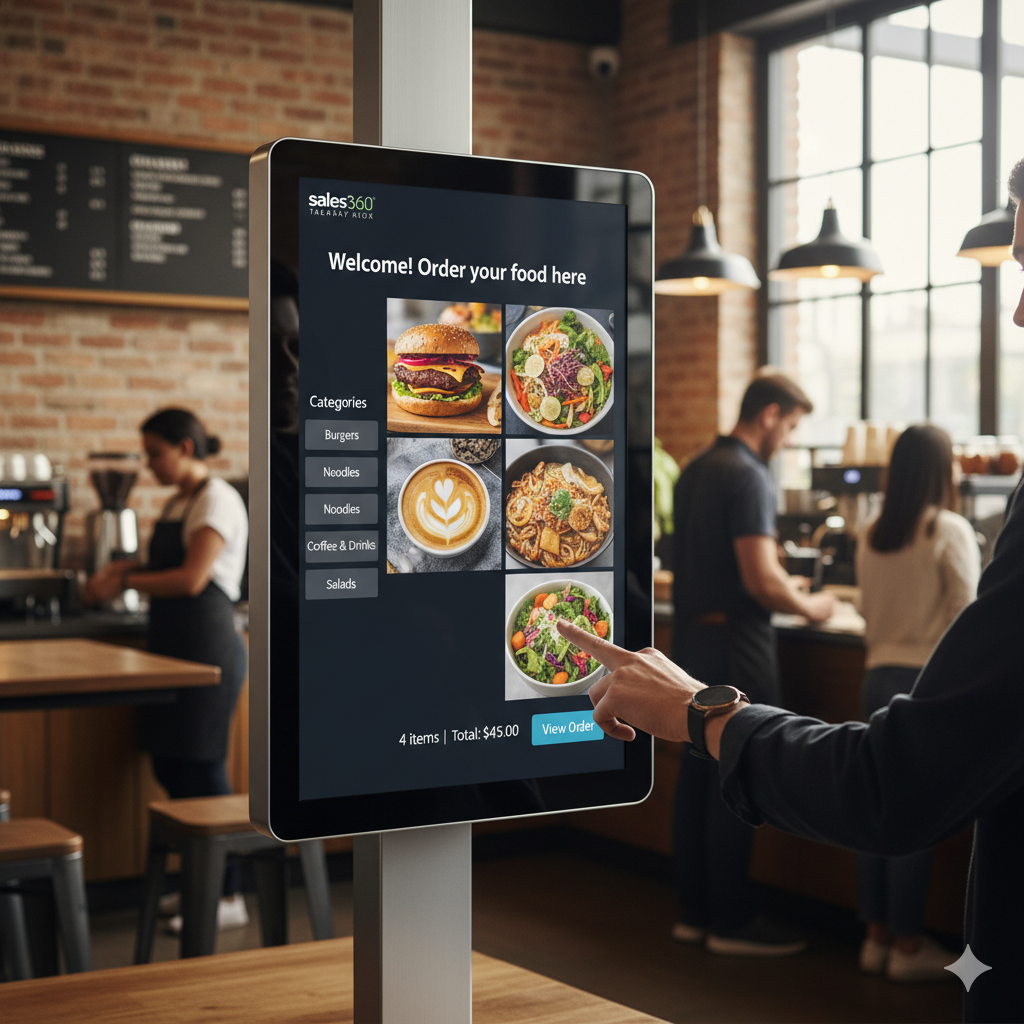
The Takeaway Kiosk module converts your standard Sales360 store into a dedicated, self-service food ordering kiosk interface. It is designed for in-store use (like a restaurant or cafe) to allow customers to quickly place an order that is instantly created in your Sales360 administration system.
Key Features:
-
Dedicated Kiosk URL: A separate, full-screen interface for ordering.
-
Menu Builder: Select specific Sales360 products to appear in the Kiosk menu from the admin panel.
-
Category Support: Option to display and filter products by selected categories.
-
Guest Checkout: Orders can be placed by non-logged-in customers by requiring just a Name and optionally a Phone Number.
-
"Pay at Counter" Integration: All confirmed Kiosk orders are automatically created in Sales360 with a "Pay at Counter" payment method.
2. Installation
The takeAway.sh script produces a compressed Sales360 Module file, typically named takeaway_kiosk.ocmod.zip.
-
Obtain the File: Run the
takeAway.shscript to generate thetakeaway_kiosk.ocmod.zipfile. -
Upload the Module:
-
Navigate to your Sales360 Admin Dashboard.
-
Go to Extensions > Installer (or Marketplace > Installer depending on your Sales360 version).
-
Upload the
takeaway_kiosk.ocmod.zipfile.
-
-
Enable the Module:
-
Go to Extensions > Extensions (or Extensions > Modules).
-
Find Takeaway Kiosk in the list.
-
Click the Install button (green
+orInstallicon) next to it.
-
3. Configuration (Admin Panel)
Once installed, navigate to the Takeaway Kiosk module settings to configure your menu.
A. General Settings
-
Status: Toggle the module On (enabled) or Off (disabled).
-
Welcome Message: The message displayed on the main kiosk screen (Default:
Welcome! Order your food here). -
Require Phone Number: If enabled, guest customers must provide a phone number to place an order.
-
Show Categories in Kiosk: Enable or disable the category navigation sidebar on the kiosk front-end.
-
Kiosk URL: The public link to the Kiosk interface is displayed here for easy access (e.g.,
HTTP_CATALOG/index.php?route=extension/takeaway_kiosk/module/kiosk_menu).
B. Categories Selection
If you enable Show Categories in Kiosk, you must select which categories will appear for filtering:
-
Select Categories: Use the table to check the box next to any category you want to display in the Kiosk sidebar.
-
Control Buttons: Use the Select All Categories and Deselect All buttons for quick management.
C. Menu Builder (Product Selection)
This section determines exactly which products are visible and available for order on the Kiosk screen.
-
Menu Products: Select the individual products from your store inventory that should be displayed in the Kiosk menu.
-
The table lists the Product Name and Price for easy reference.
-
Control Buttons: Use the Select All Products and Deselect All buttons to manage the product list efficiently.
4. Usage (Front-end Kiosk)
Access the Kiosk interface using the Kiosk URL provided in the admin settings. The Kiosk runs in a simplified, full-screen mode.
A. Ordering Process
-
View Menu: The main screen displays the Welcome Message and the grid of selected Menu Products.
-
Filter by Category (Optional): If enabled, customers can select a category from the sidebar to view a filtered list of products.
-
Add to Order: Clicking a product tile will instantly add it to the order session (shopping cart).
-
View Order: A persistent bar at the bottom of the screen displays the current total number of items in the order (
X items). Clicking this button opens the checkout view.
B. Order Confirmation and Placement
-
Checkout View: This screen displays a summary of all items in the order, including quantity, price, and the final total.
-
Customer Details:
-
Logged-in Customers: The name and phone fields are pre-filled (if logged in).
-
Guest Customers: The customer must enter a Name, and a Phone Number if required by the module settings.
-
There is also a field for Notes/Special Instructions.
-
-
Place Order: Clicking Place Order performs the final steps:
-
A new Sales360 order is created with the customer details provided.
-
The payment method is set to "Pay at Counter".
-
An order history entry is added (default status is
Processing). -
The customer's session is cleared, and a Success message is displayed with the new Order ID.
-
HashPalLabsBlog
Our flagship product is the Sales 360 Platform, a comprehensive, privacy-first solution designed to power sales and marketing for your enterprise, restaurant, grocery store, small business, e-commerce shop, logistics operation, HRMS service, or general service provider, helping your team grow efficiently and securely.
It's also ideal for influencers looking to build and scale their own sales channels or businesses. We offer continuous mentorship and dedicated support to all our clients.
To connect with us visit:https://www.hashpallabs.com